Are you a Golf Professional?
Sign up as a Golf Coach and invite your Players to join here
Sign up here nowAre you a Player?
Please download the app and join your Golf Coach here


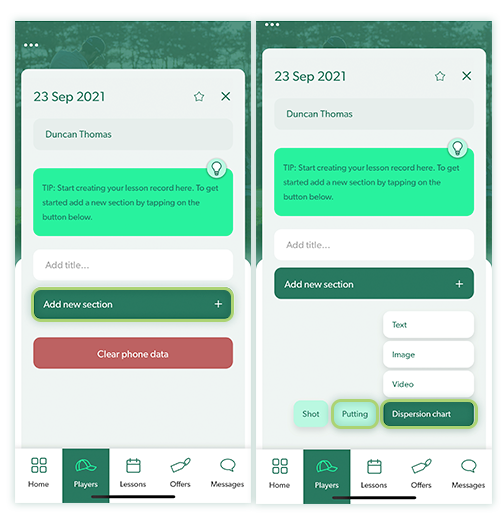
Creating lesson records
Lesson records create a historical record of the coaching you have provided to each Player using the Lesson Pro app.
It’s invaluable to the Player, providing a record for them to reference whenever they like and to look back as far as they need to.
For Golf Professionals it too creates a useful reference point for each succeeding lesson that they teach and also a historical reference to demonstrate improvement and maintain a stronger connection with their Players.
Lesson records can be made up of as many elements as you need and can be built up in whatever order you choose, a fully flexible tool to build your lesson record.
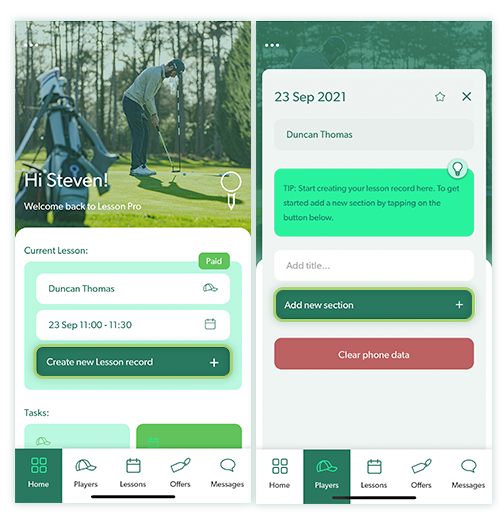
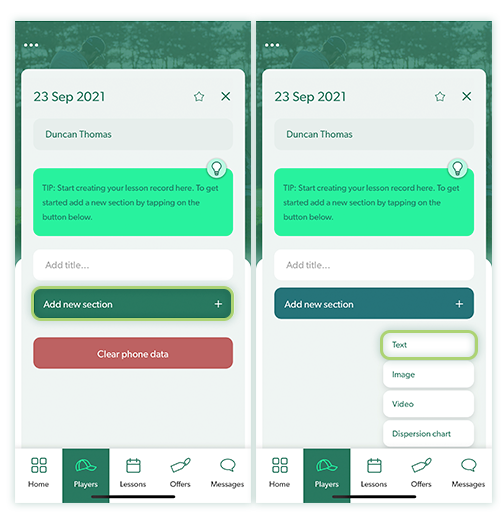
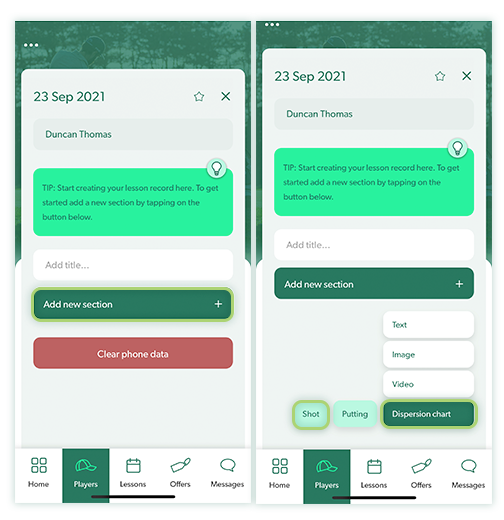
Start a lesson record
During a lesson
To create a lesson record during a lesson:
- Tap Home on the main menu
- Tap Create new lesson record under Current lesson
- You will now be presented with a blank lesson record
- The date and Player name will feature at the top of the record
- Tap Add new section to begin creating your lesson record
After a lesson
To create a lesson record after a lesson has passed:
- Tap Players on the main menu
- Tap the Player name of the account you would like to update
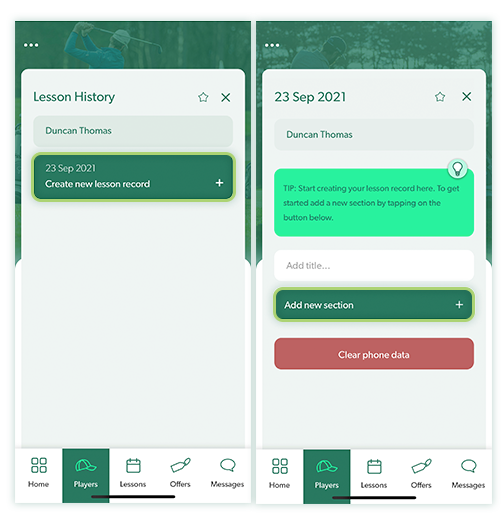
- Tap History
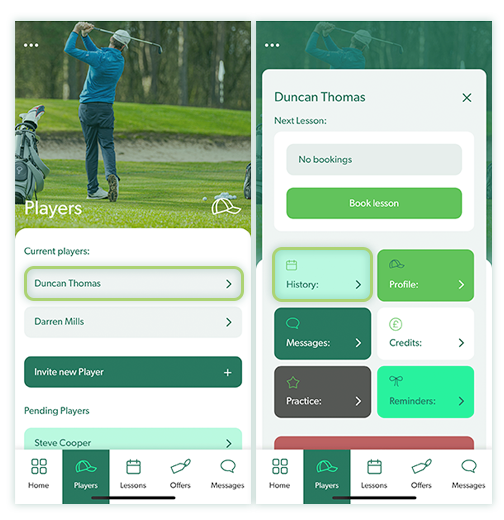
- Tap Create new lesson record for the corresponding date
- You will now be presented with a blank lesson record
- The date and Player name will feature at the top of the record
- Tap Add new section to begin creating your lesson record
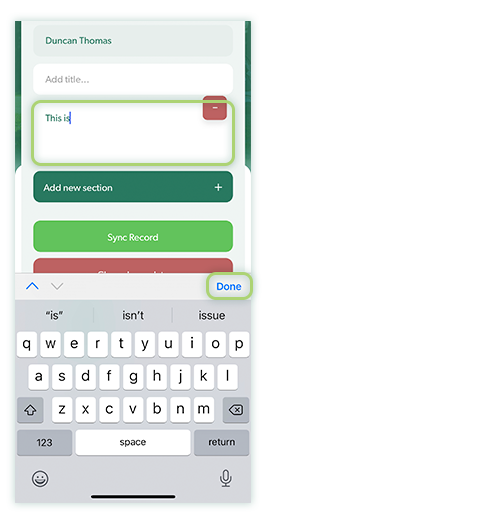
Adding text elements
To add a text element:
- Tap Add new section
- Tap Text
- Tap the white box
- Type your text into the box
- When complete click Done on your keyboard
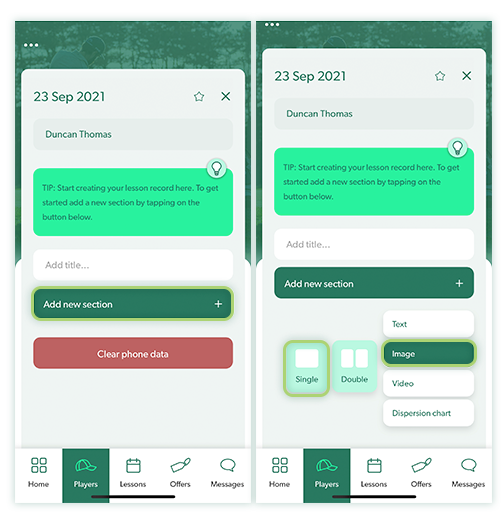
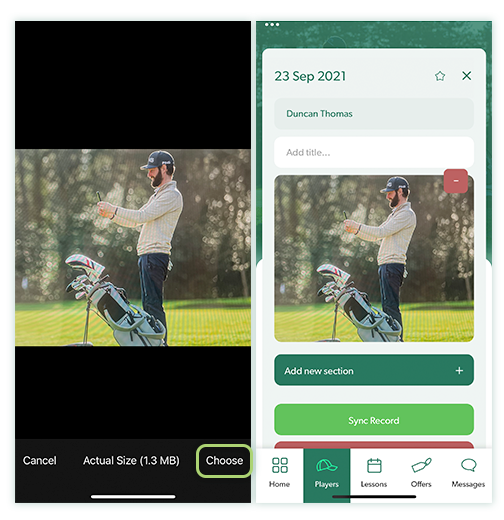
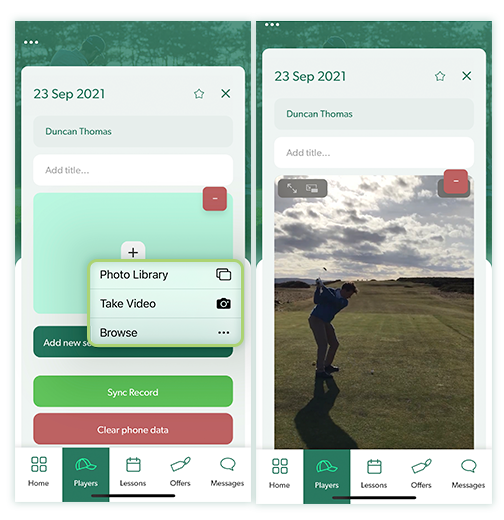
Adding image elements
To add an image element:
- Tap Add new section
- Tap Image
- Select either a single image or double (side by side layout)
- Tap the plus symbol in the box(es) provided for the image(s)
- Select Photo Library to add an image store on your device
- Select Take Photo to use your device to take an image
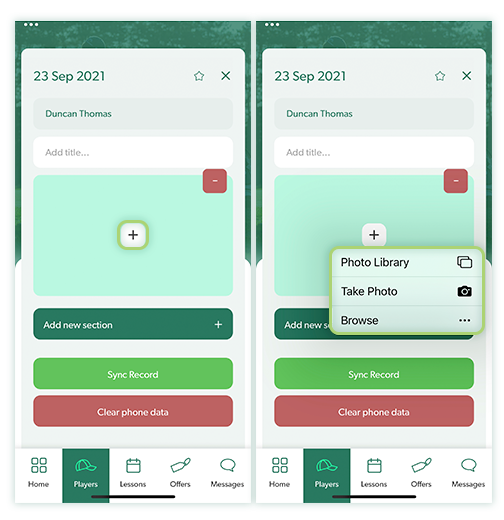
- Once the image has been chosen / taken select Choose to add the image
Adding video elements
To add a video element:
- Tap Add new section
- Tap Video

- Tap the plus symbol in the box provided for the video
- Select Photo Library to add a video stored on your device
- Select Take Video to use your device to take a video
- Once the video has been chosen / taken select Choose to add the video
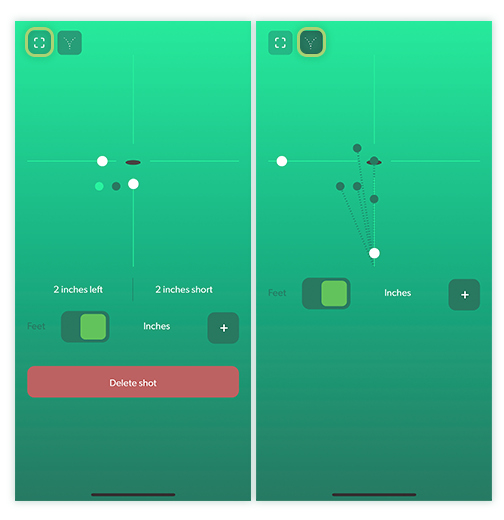
Adding dispersion charts
To add a dispersion chart element:
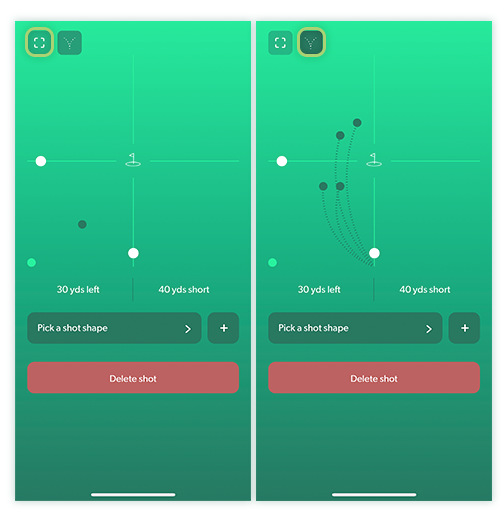
Shot dispersion charts
- Tap Add new section
- Tap Dispersion chart
- Tap Shot
- Begin by moving the white circles to position the shot
- The measurements displayed relate to distances from the target area
- Then pick a shot shape
- Tap the plus symbol to add the next shot and repeat as necessary

The icons in the top left of the chart will:
- Magnify and minimise the chart
- Display and hide all shot shapes
Putting dispersion charts
- Tap Add new section
- Tap Dispersion chart
- Tap Putting
- Begin by moving the white circles to position the putt
- The measurements displayed relate to distances from the target area
- Select either feet or inches depending on the exercise being recorded

- Tap the plus symbol to add
- Repeat as necessary
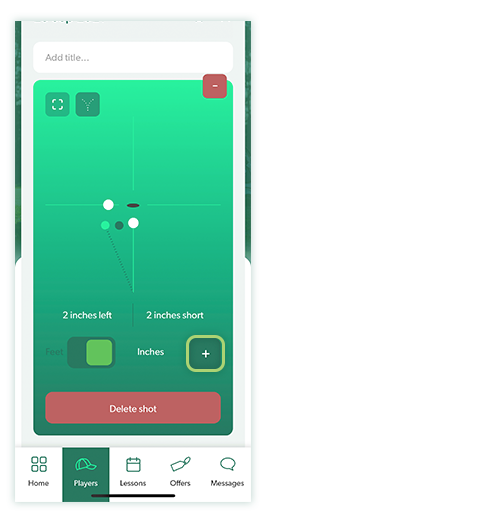
The icons in the top left of the chart will:
- Magnify and minimise the chart
- Display and hide all putt directions